Profiles mass creation
Introduction
Vision offers mass profile creation through two methods: mass import and account parser.
The functionality of mass import and the account parser is combined in a single interface, and the choice between the two methods depends on the type of data being loaded.
 To enter mass profile creation mode, click the Create Profile button, and then navigate to the Import tab.
Account Parser
The parser is designed for direct loading of files from account stores in .txt format, which contain data for one or more accounts.
The advantage of the parser is that you don't need to distribute data in a template table; simply choose (or drag and drop) the required file into the mass creation interface and, if necessary, select the required settings for browser profiles.
File Upload
You can upload the accounts file to Vision using three methods:
- Simply drag and drop it from the folder on your PC into the mass profile creation interface - Drag'n'Drop
- In the mass profile creation interface, click the Choose File button
- Copy the contents of the accounts file and click the Paste from Clipboard button
The result of the methods mentioned above will be the display of accounts from the file in a table:
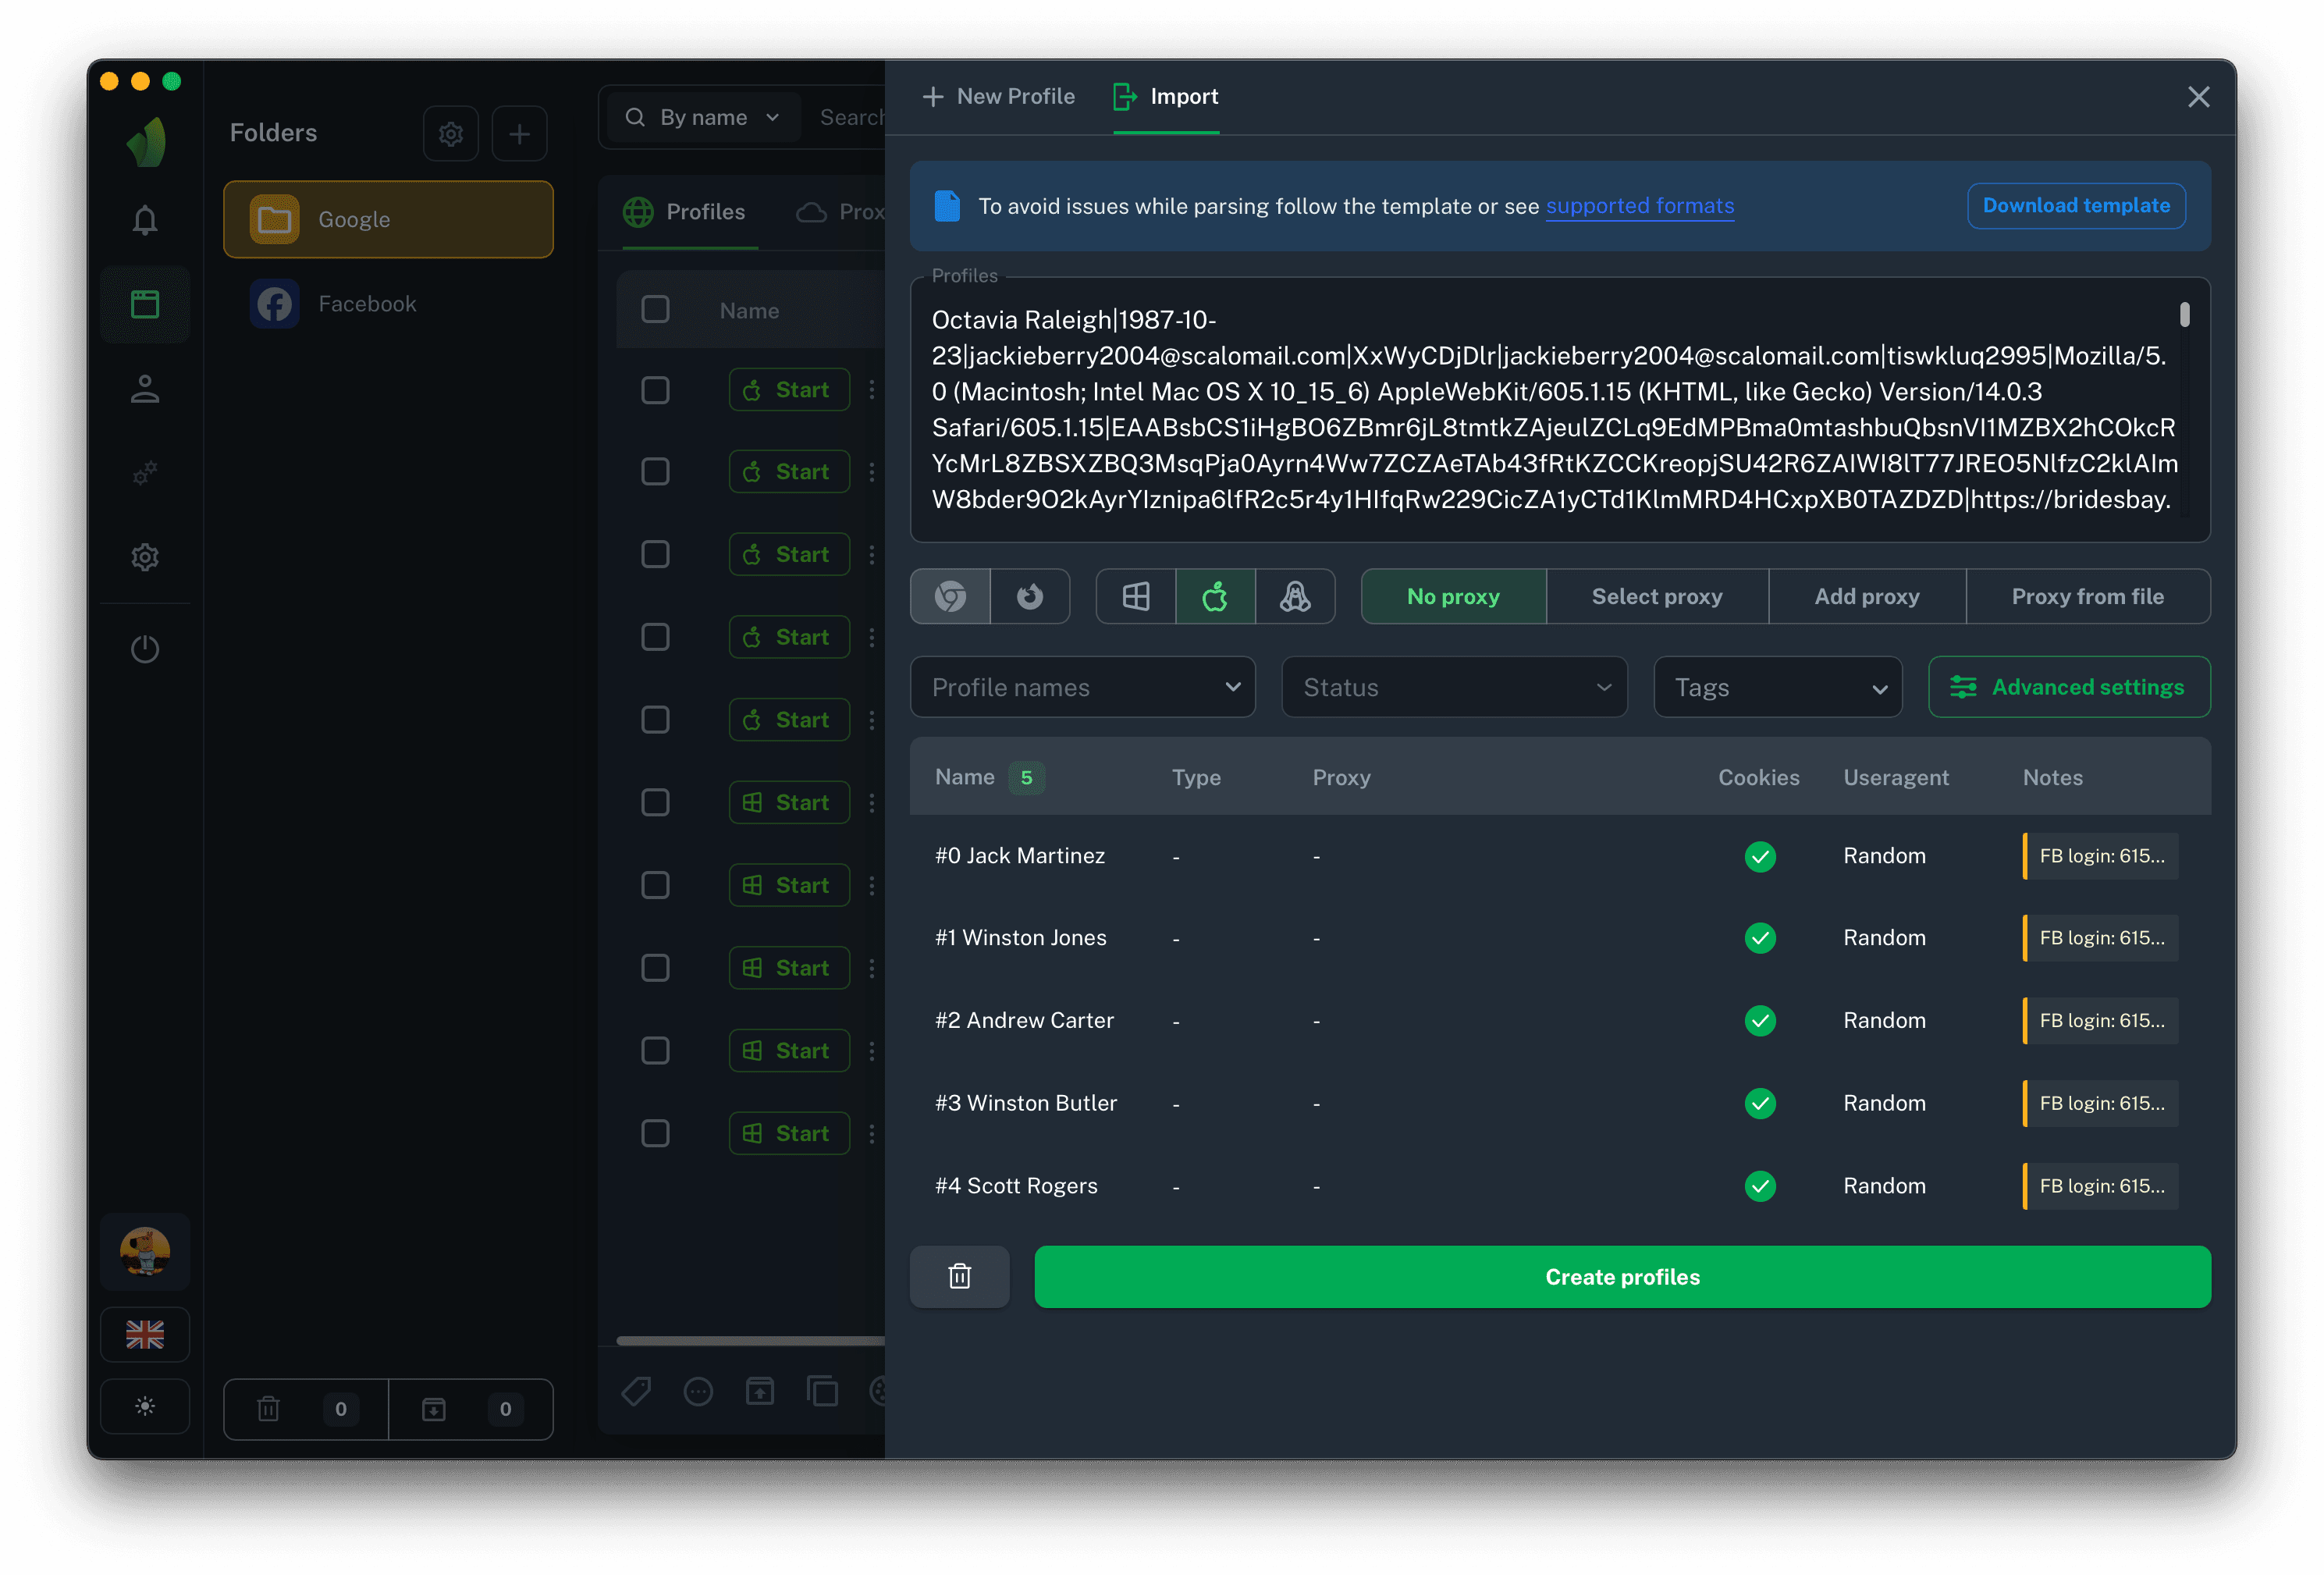
All that's left for you to do is make any necessary changes to the profile settings and click the Create Profiles button.
Please note that data not related to browser profile settings (such as login, password, token, etc.) will be recorded in the profile notes!
Supported Parser Formats
The output format of accounts may vary from store to store, but we've aimed to encompass as many parsing options as possible. Below, you can see several potential formats that our parser can recognize:
Fb: login : password | E-mail: email@gmail.com:9786g786g98:8uh8uh98uh
https://www.facebook.com/profile.php?id=876097098778098 | UserAgent: Mozilla/5.0 (Windows NT 10.0; Win64;
x64) AppleWebKit/537.36 (KHTML, like Gecko) Chrome/119.0.0.0 Safari/537.36 | token:
EAABsbkjjHJHhjlsdkjhshfsdl | JSON Cookie:
login|password|email@gmail.com|password|https://www.facebook.com/profile.php?
id=78698778678|12|11|1993|EAABtoken|act=785786576576|[cookies]|Useragent|Keyslogin:pass:id:date:useragent:cookiesFB: Email@gmail.com:password E-mail: email@gmail.com:password
https://www.facebook.com/profile.php?id=4567567567567 [cookies] Token: EAABToken User agent: Useragent 14 мая 1998email@gmail.com password Useragent EAABsbToken email@gmail.com emailpassword [cookies] date1 date2Note that this is far from an exhaustive list of formats, and parsing success does not always depend on the format. If the account seller has provided incorrect cookies, a profile will be created, but there will be no authorization in it.
If, by any chance, your file from the account shop was not recognized by our parser, simply write to us in technical support. We will quickly resolve this issue 😉
Mass Import from a Spreadsheet
Mass import from a spreadsheet is convenient because it allows you to upload accounts that you obtained not from the store but, for example, from another anti-detection tool. It will also be useful for users who only have cookies; you can simply paste them into the spreadsheet and transfer the spreadsheet to the mass profile creation interface.
Template Download

You can download the table template in the bulk profile creation interface. To do this, click the Download Template button on the blue background, save the template in a convenient location for you, and open it using any spreadsheet editor. We recommend doing this through Google Sheets as it provides easy export to .csv format, but more on that below.
Importing the Template into Google Sheets
As mentioned, we recommend using Google Spreadsheets to edit the bulk import table. All we need to do is import the table.
Just three steps:


Filling the Table

There are a total of five columns in the table: Profile name, Proxy, Cookies, User-Agent, notes. To ensure the correct functioning of mass import, at least one of the five aforementioned columns needs to be filled. It can either be Cookies alone or just the profile name. This choice doesn't carry significant weight; it depends on your objectives.
If you only fill the column Cookies/Useragent/Proxy/Notes, all profiles will be created, but they will have arbitrary names in the format Name Lastname.
If you only fill the column Profile Name, all profiles will be created without Cookies, Proxies, Notes, and with a User-Agent from the fingerprint.
Additional columns in the table
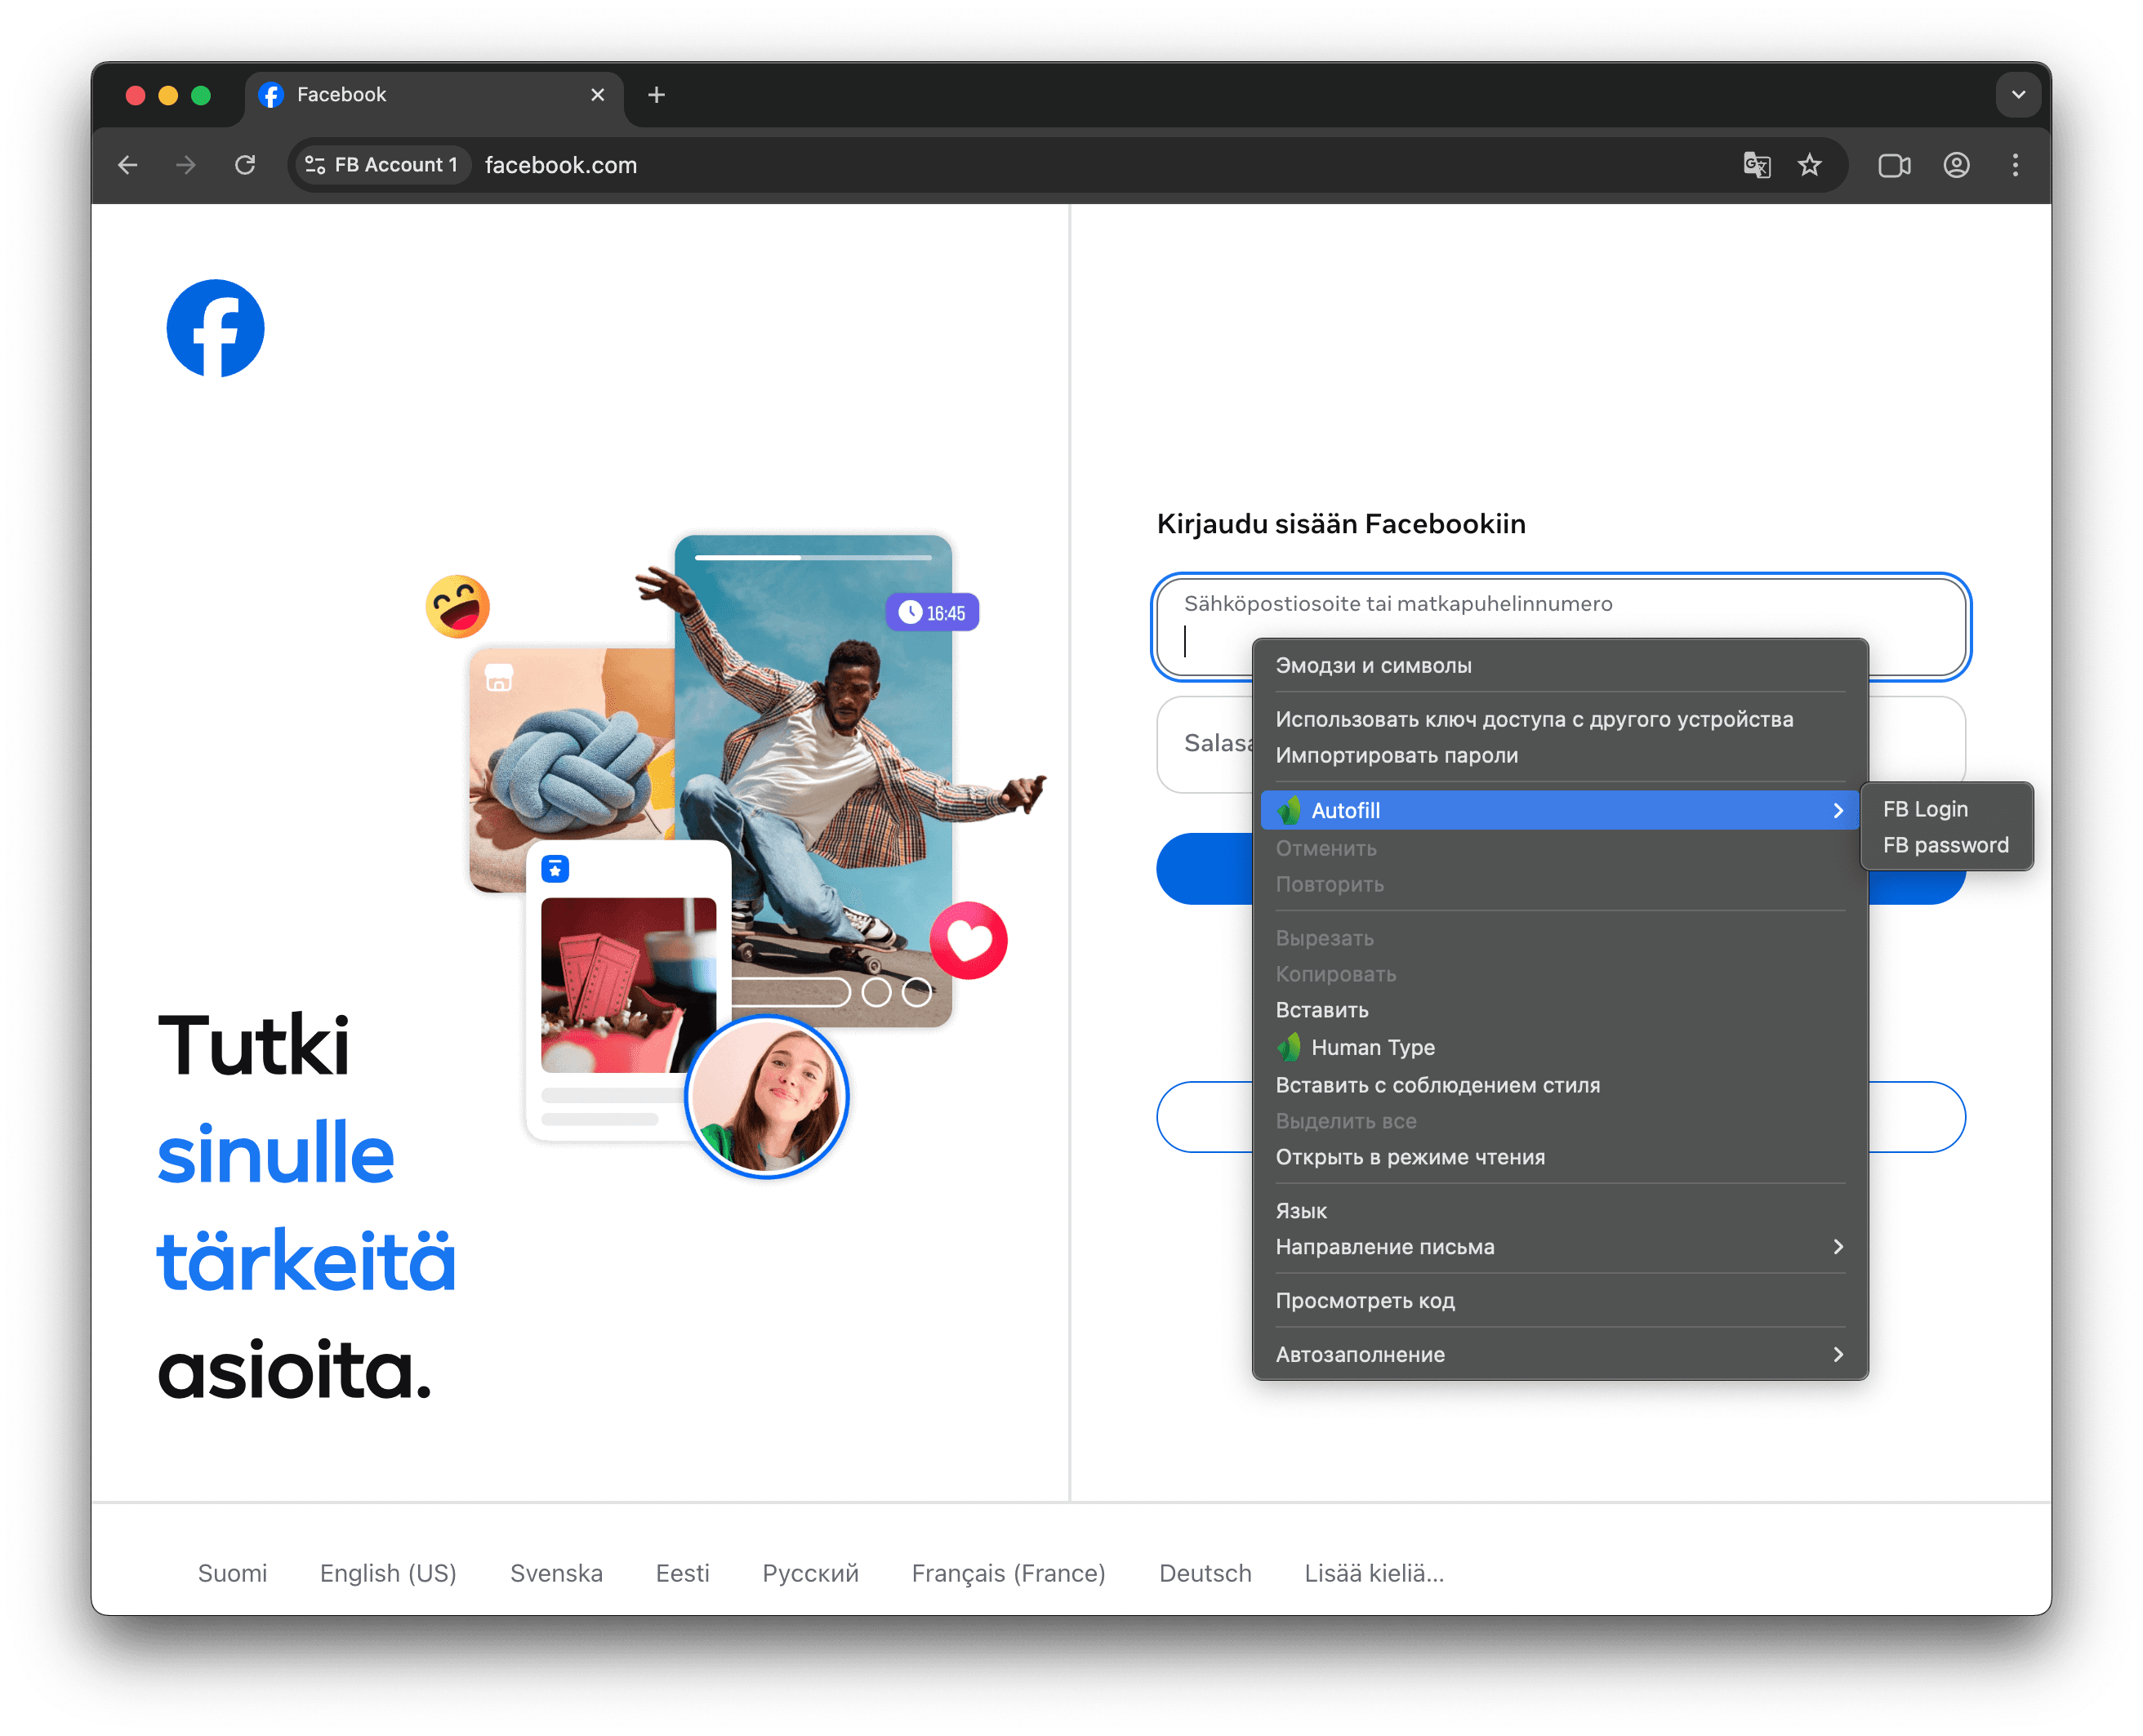
In Vision, when importing data in bulk from a spreadsheet, you can specify additional columns so that the information in them can be used later within the profile. For example, you can add FB Login and FB password columns and enter the email address and password for the Facebook account in them.
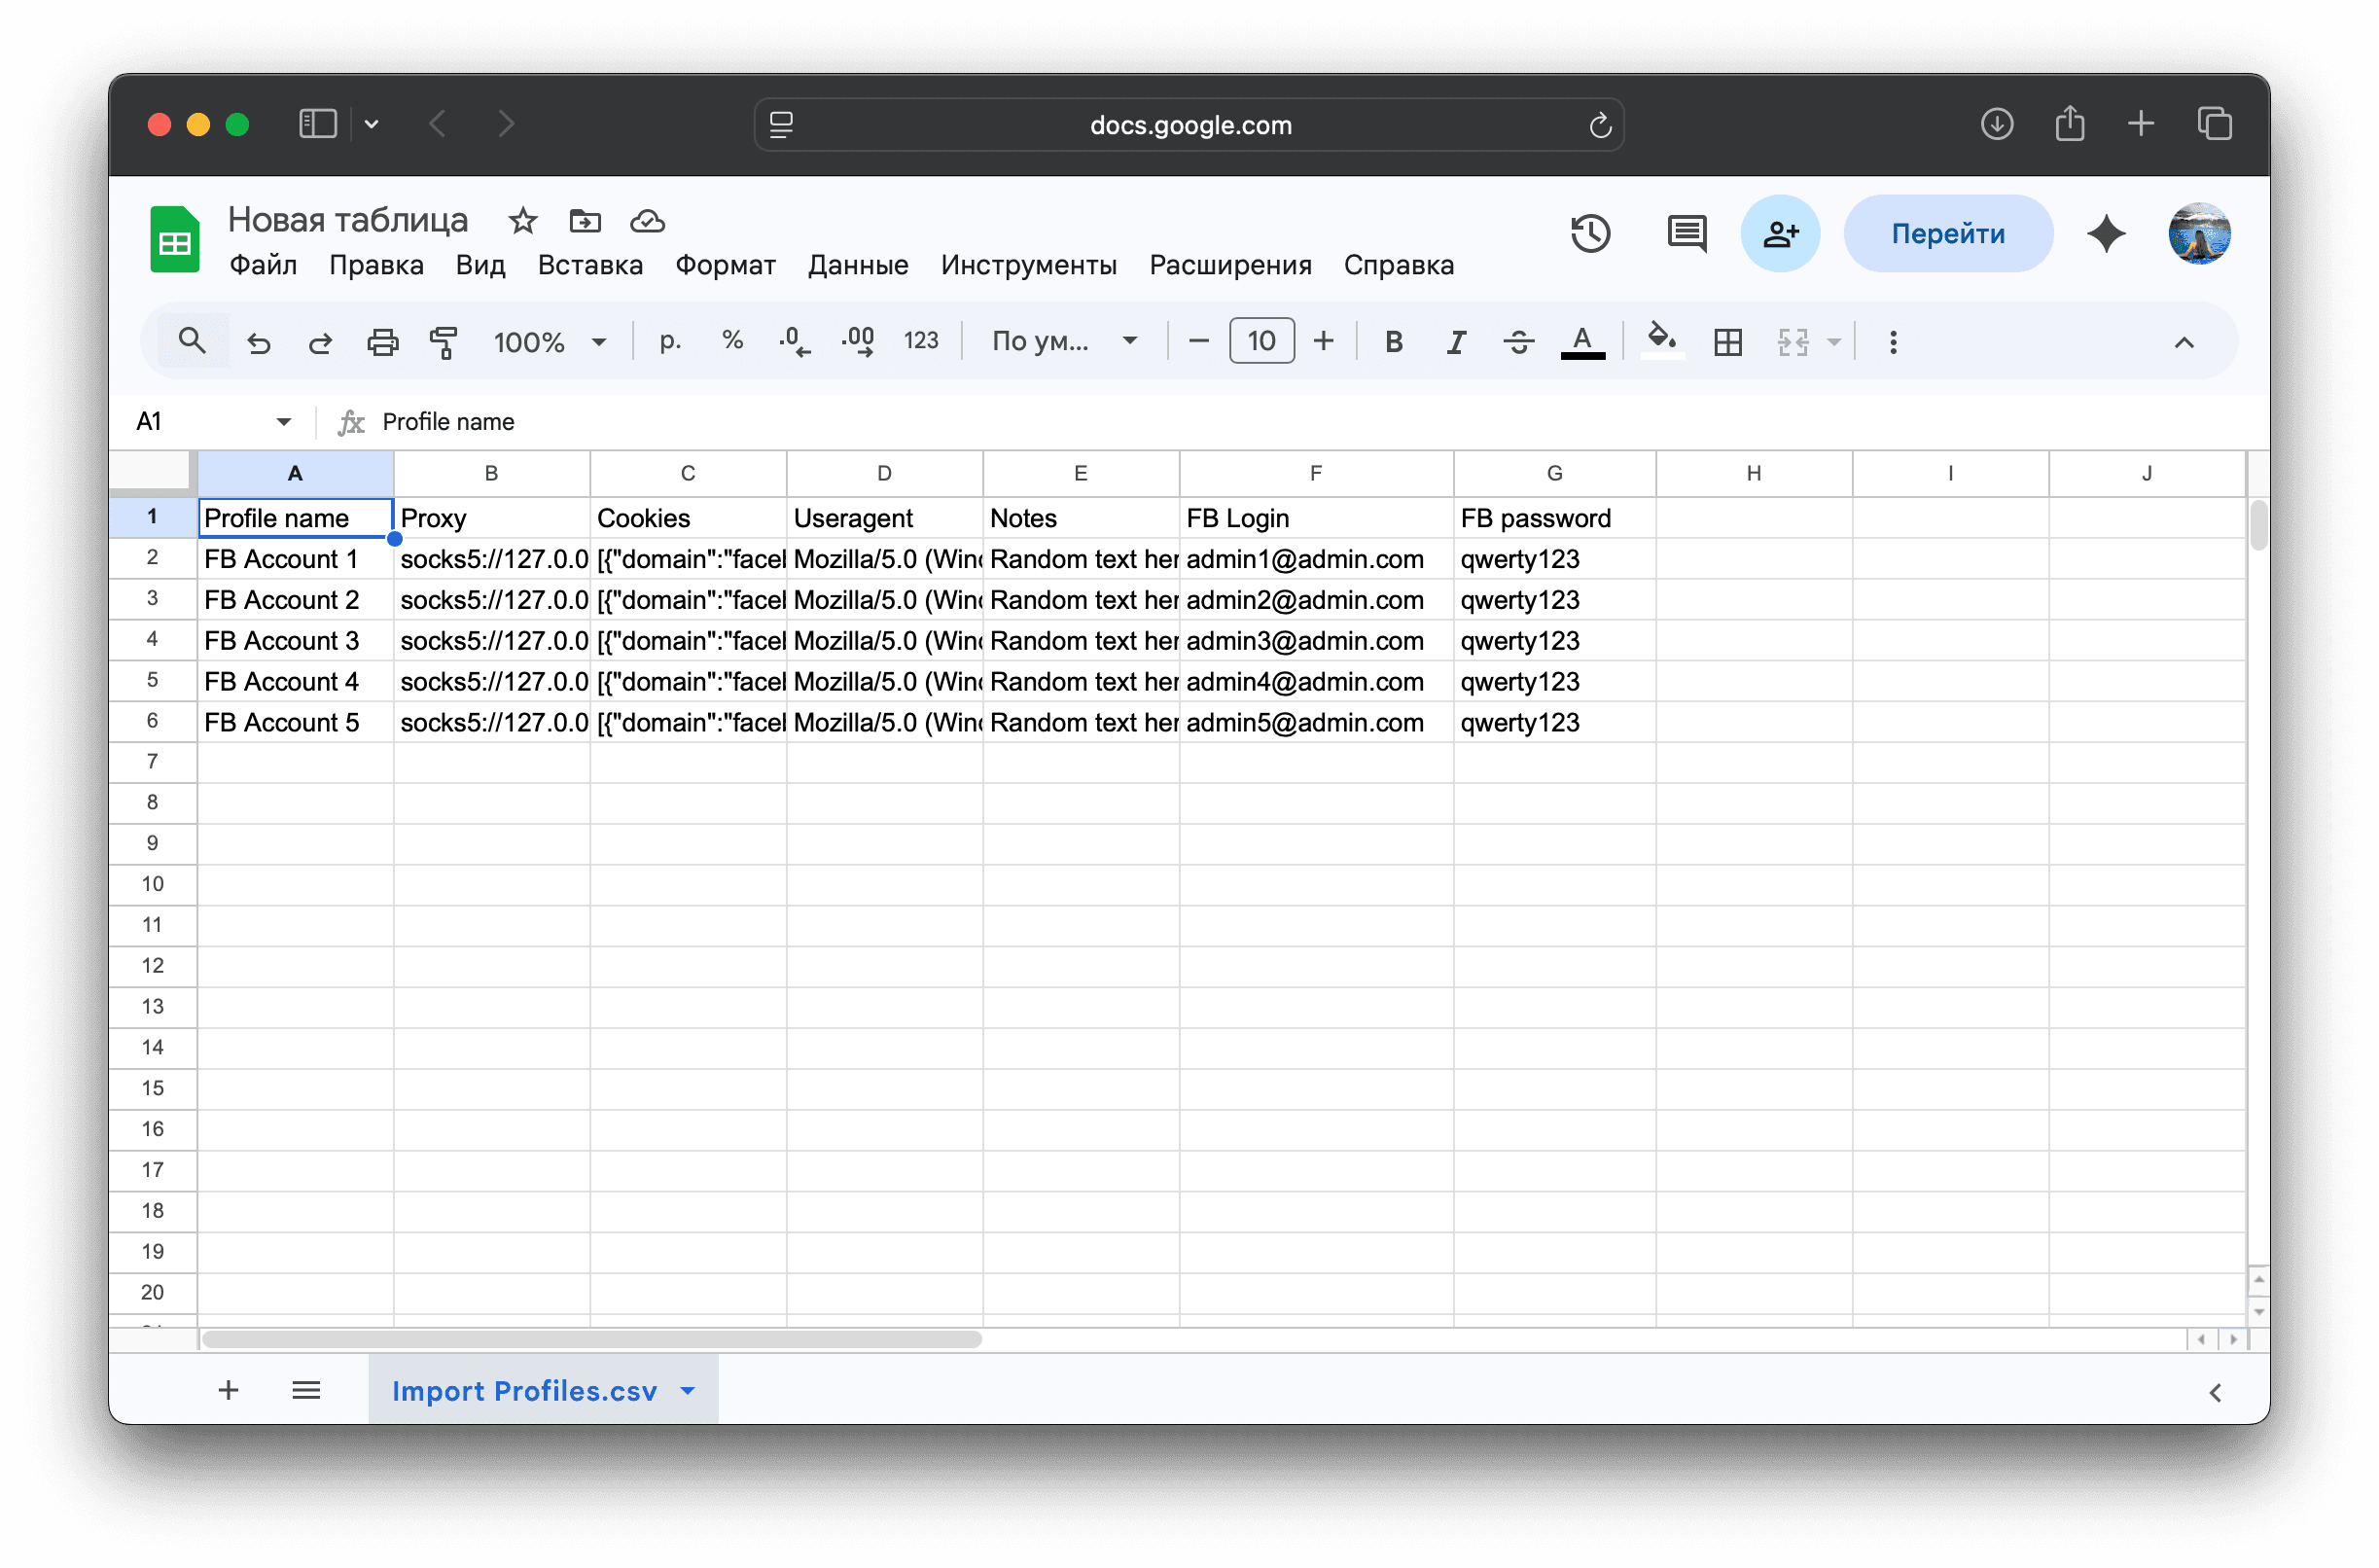
Once the .csv file has been imported, the data from these columns will be added to the profile notes in key: value format, meaning it can be used within the profile via Vision Autofill
Exporting the Table and Importing into Vision
Once the table is filled, the next step is to export it in .csv format. This is crucial as importing tables in other formats into Vision is not possible.

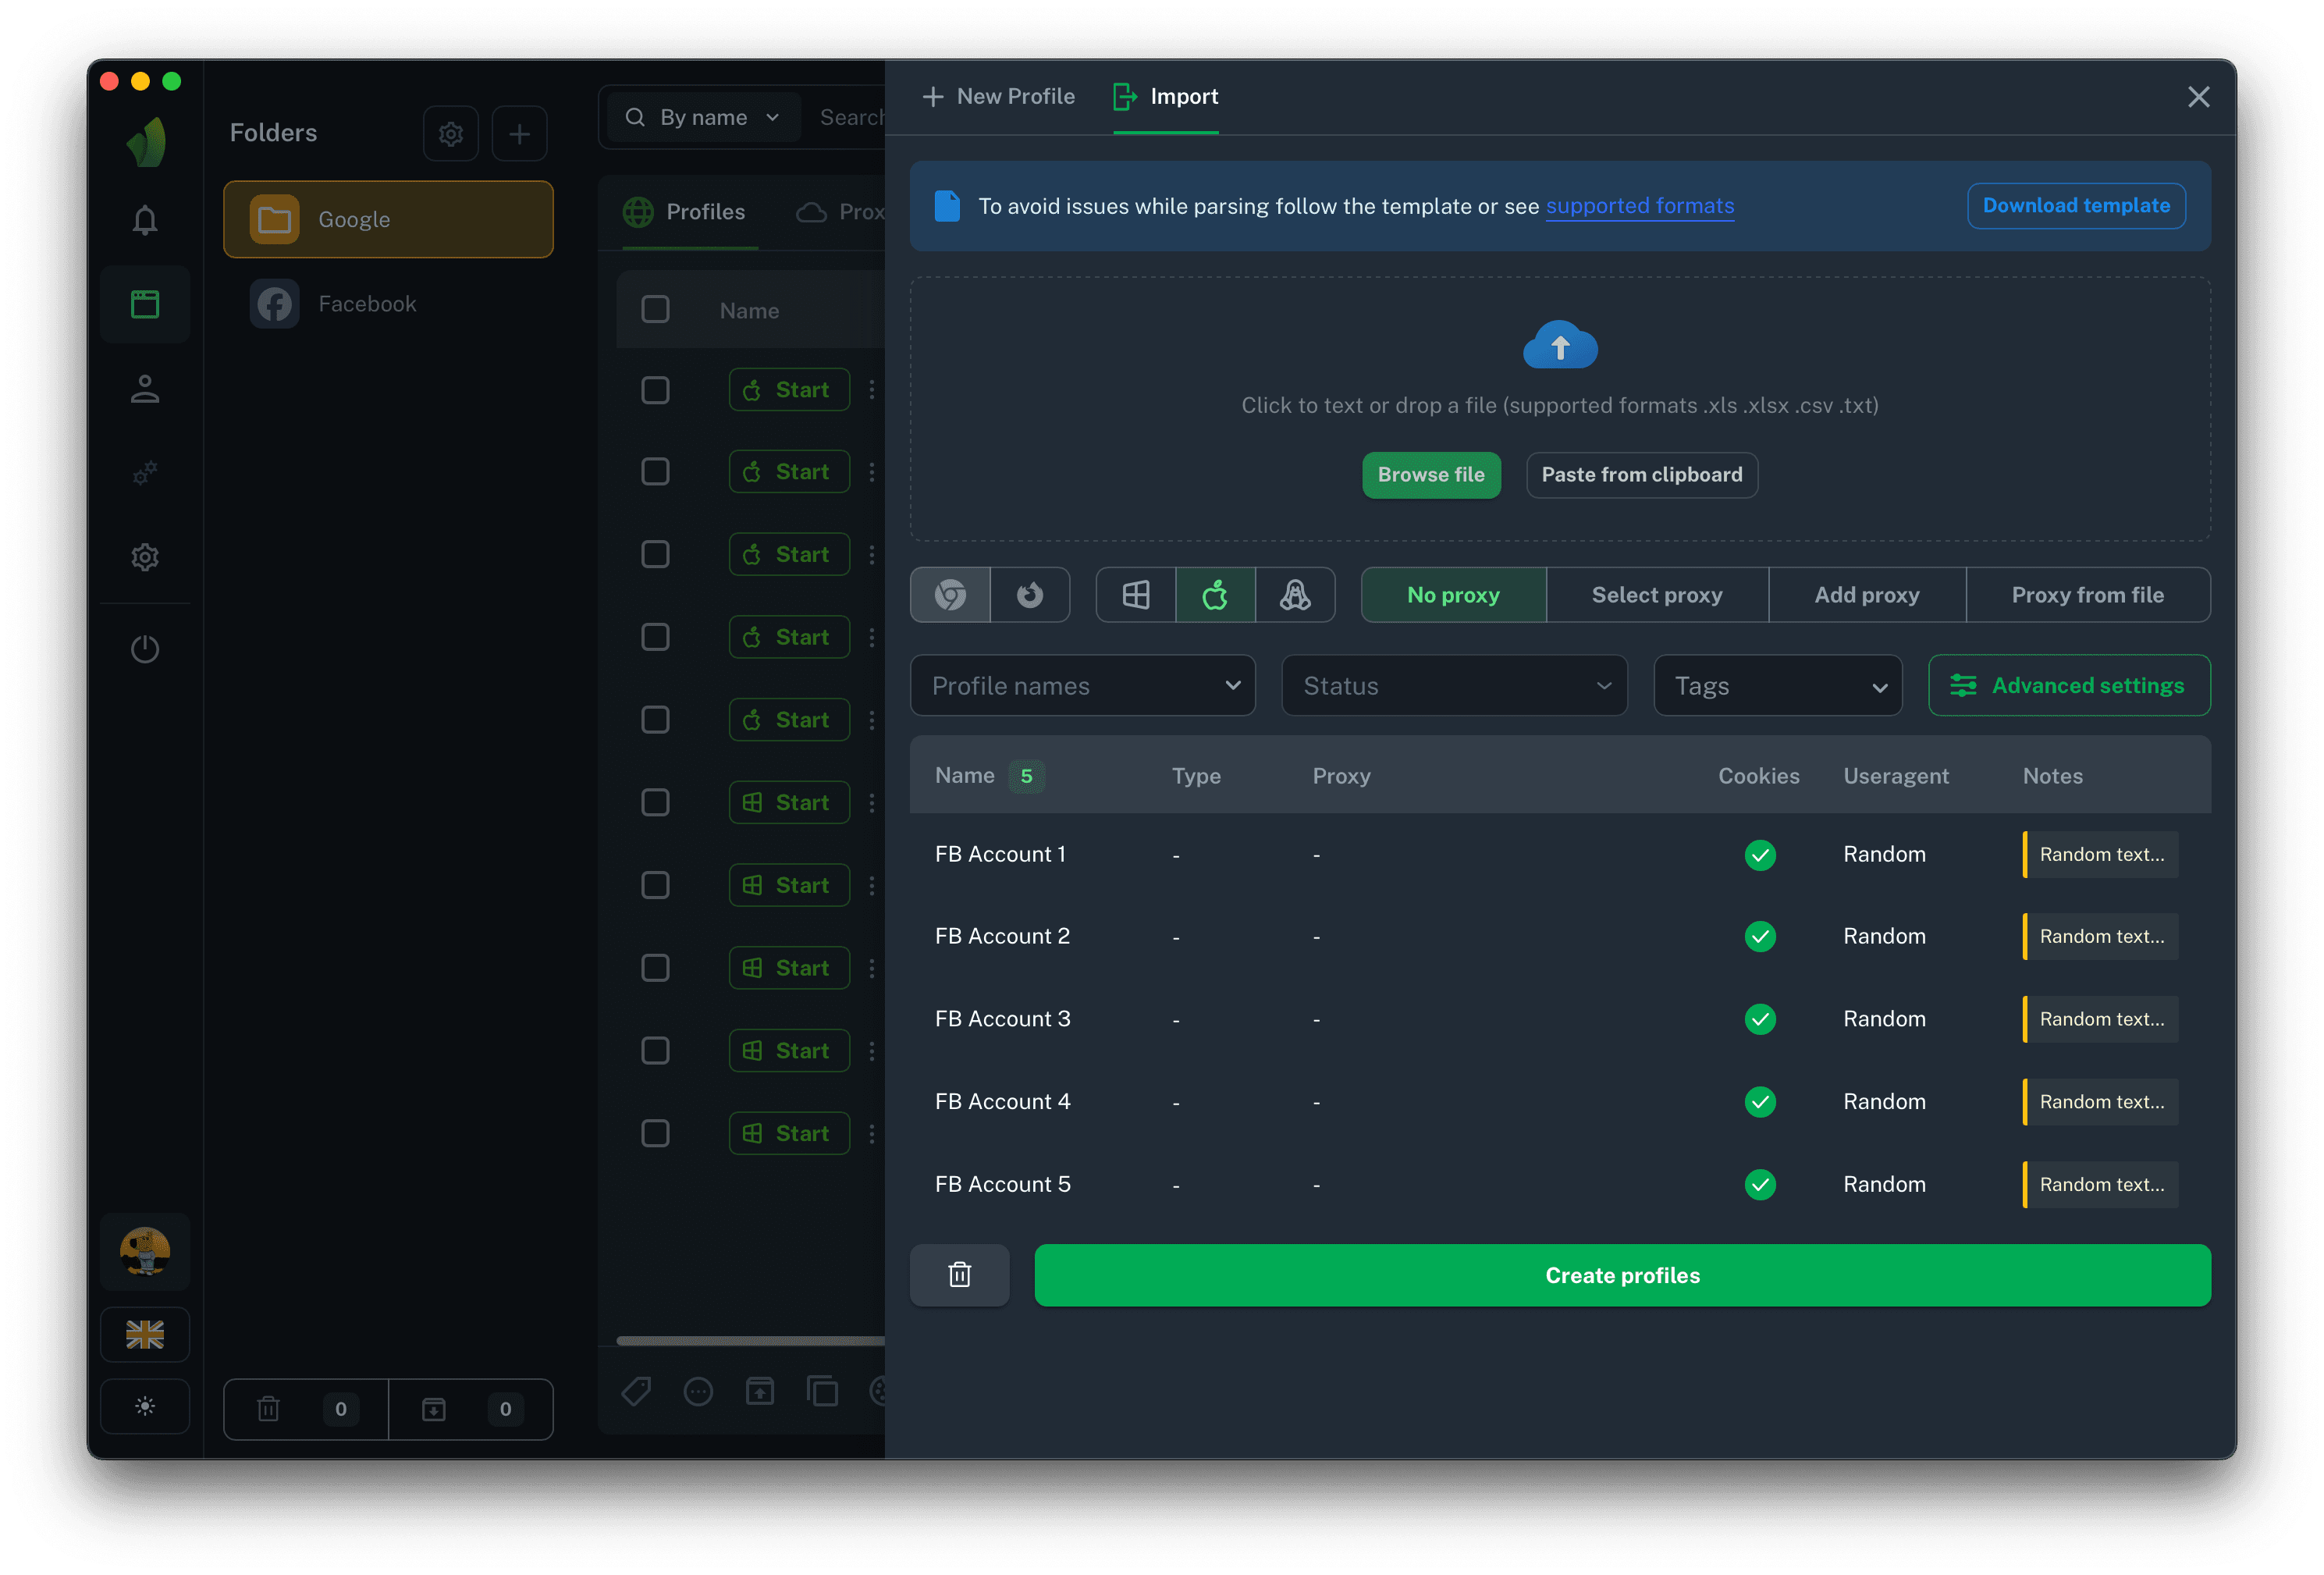
All you need to do now is modify the profile settings if necessary and click the Create Profiles button. Profiles will be created with the data specified in the table.
Please note that we strongly advise against using the User-Agent provided by the account seller, as it may be an outdated version of Chrome. This can significantly affect the longevity of your accounts and the functionality of your browser.
For example, some extensions simply do not work on older versions of Chrome. The same can happen with certain features of Facebook or Google.