Create proxy
Create proxy
In Vision you can add proxies in several ways:
- on the Proxy tab in each folder
- when creating a profile
- when changing the proxy for a specific profile
- bulk import of proxies
Let's take a closer look at each of the methods.
Add on the Proxy tab
Each folder has a corresponding section where you can add proxies, edit them, move or delete them.
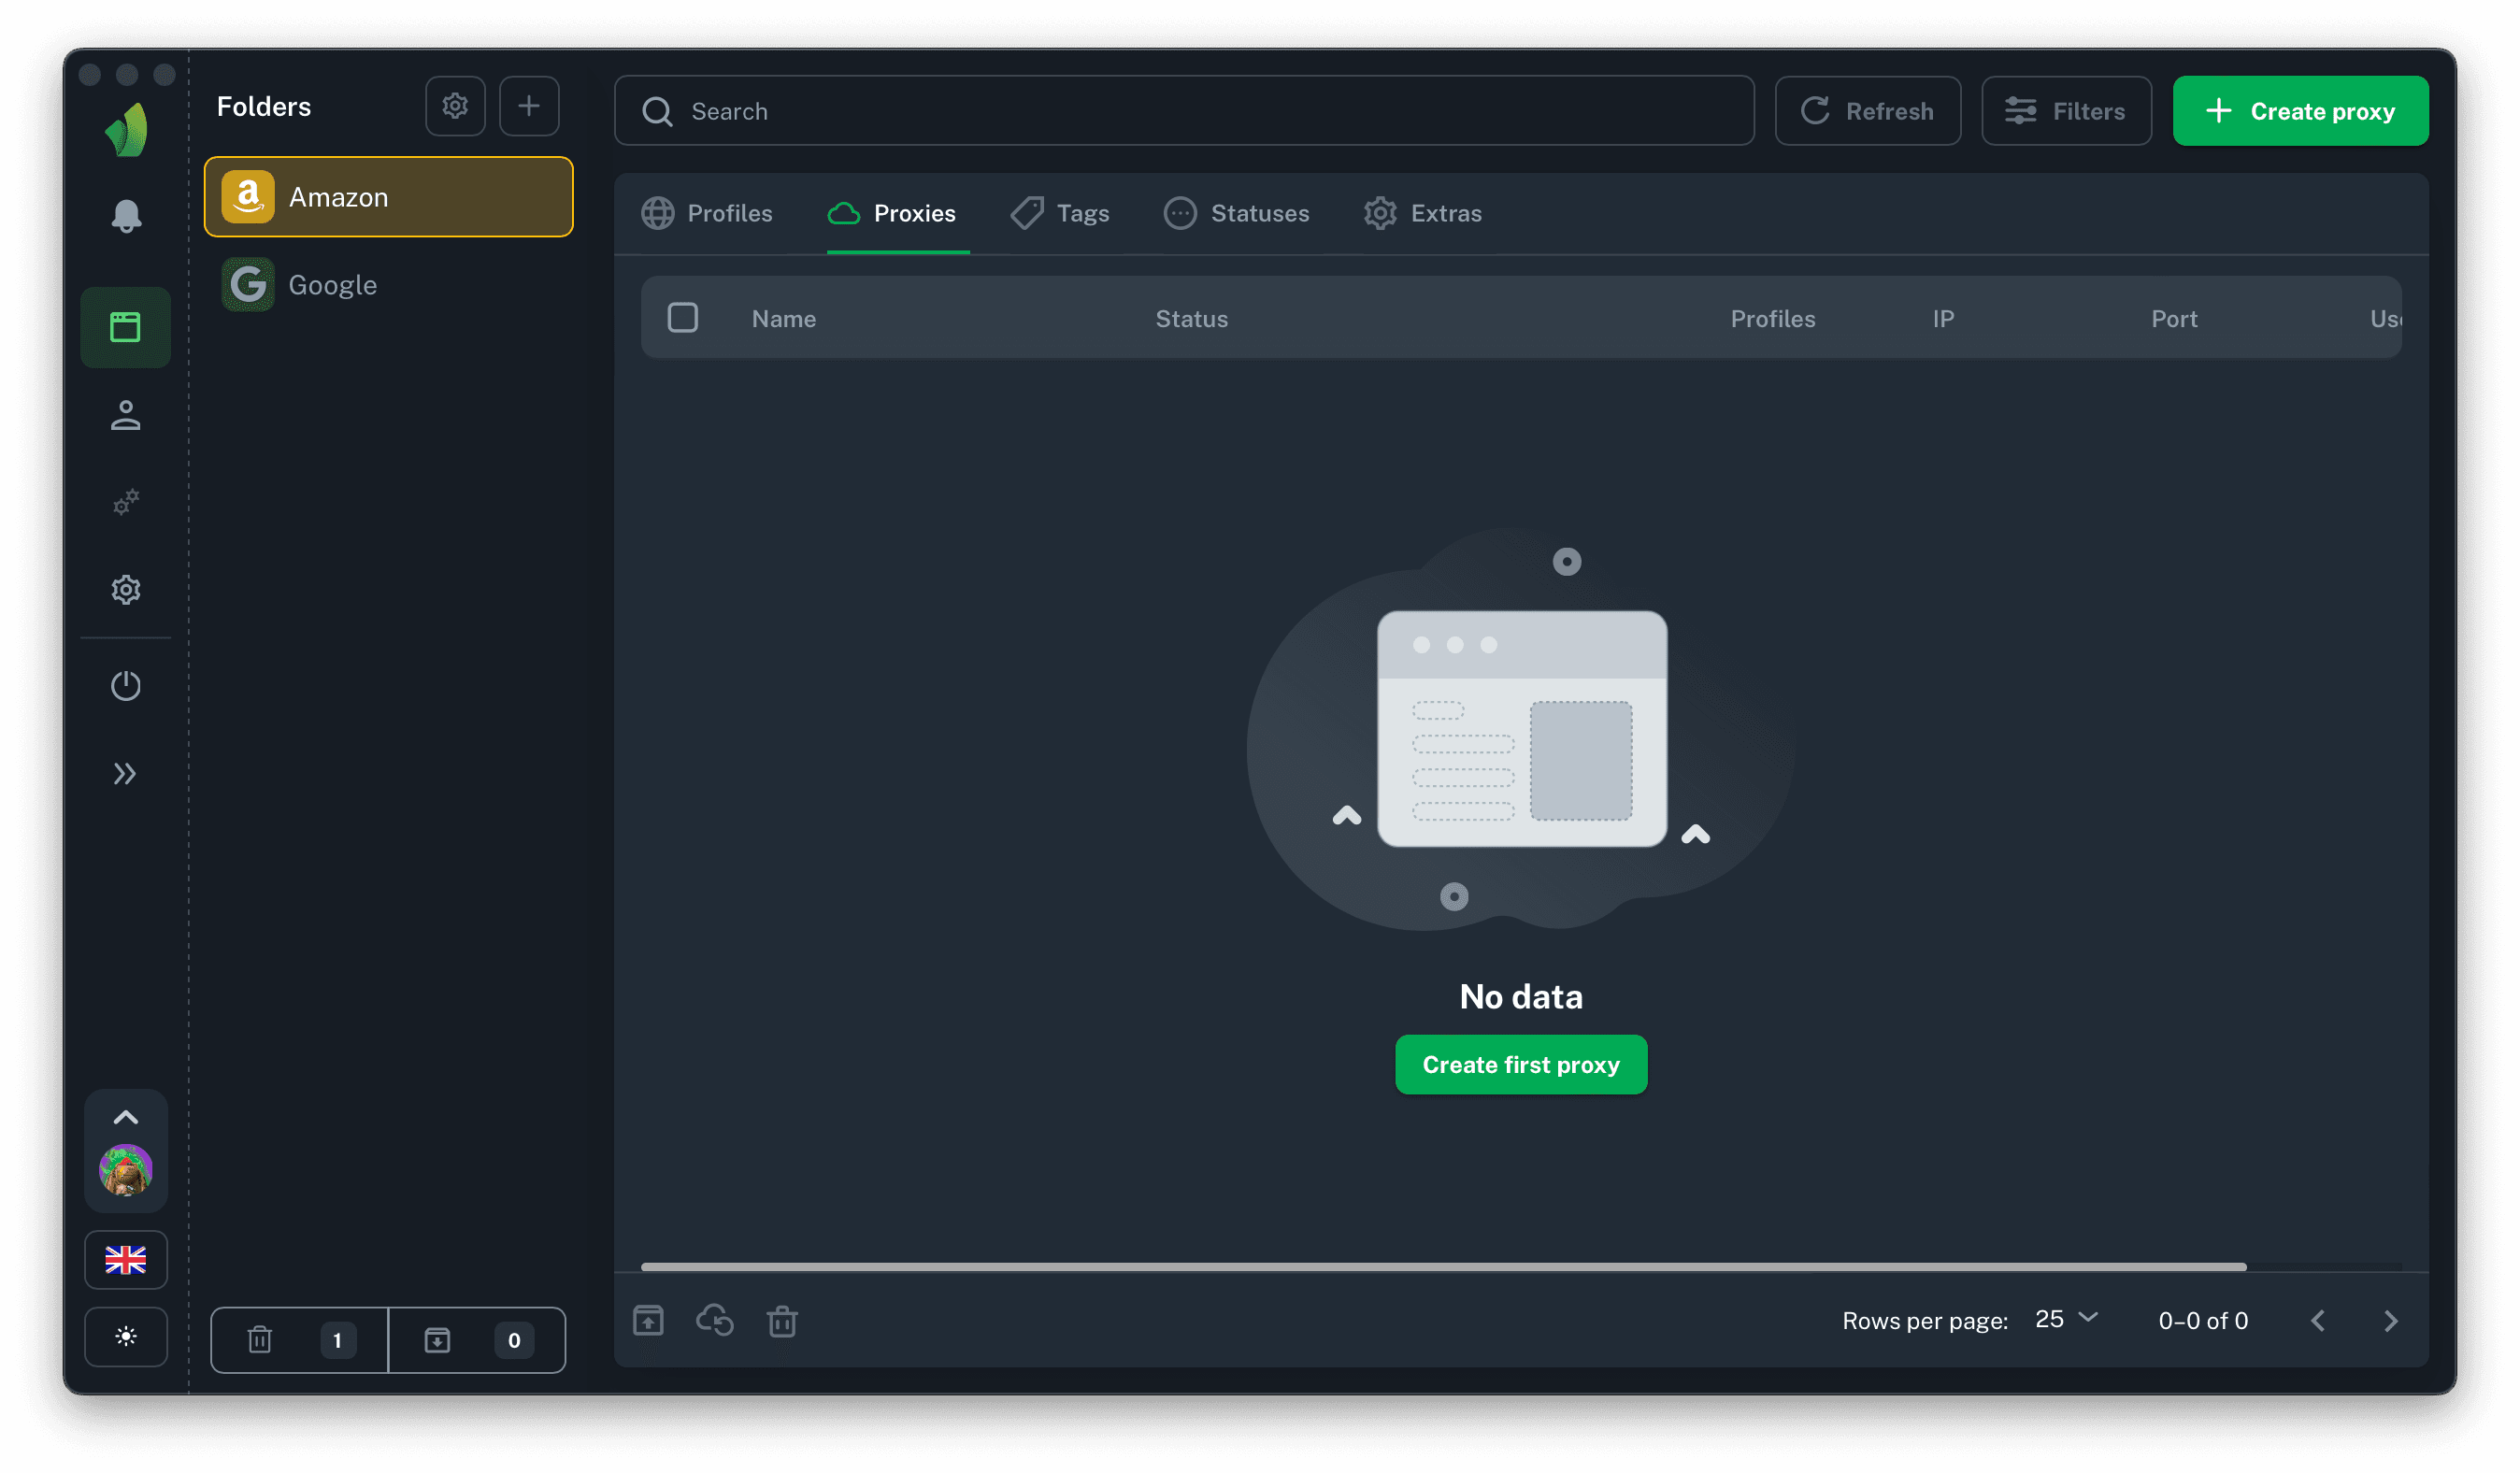
To add a proxy, you need to click on the Create Proxy button, enter all the necessary data in the proxy creation sidebar, and then click on the Create button.
 Click on the Create Proxy button (circled in green on the screenshot)
 In the proxy creation sidebar enter all necessary proxy data: protocol, IP, port, login, password, link to change IP. The list of available formats is available in the article About Proxy. After filling in all required fields click Save button
 Once saved, the proxies will be added to the Proxies section of the current folder
The Proxy Name and IP Change Link fields are optional and can be left blank. If the Proxy Name field is not filled in, the name will be generated automatically.
Adding a proxy when creating a profile
Another way is to add a proxy in the profile creation sidebar. The method is completely similar to the previous one, only the place of addition is changed.
 On the Profiles tab, click Create Profile, in the profile creation sidebar that opens, click Add Proxy (highlighted in green)
 In the form that appears, enter all necessary proxy data: protocol, IP, port, login, password, link to change IP. The list of available formats is available in the article About Proxy. After filling in all required fields, if necessary, make changes to the browser profile fingerprint and click Create Profile.
 A profile will be created with the proxies you specify.
Add a proxy when changing the browser profile proxy
The next way to add a proxy is available in the table of browser profiles on the Profiles tab. If you have enabled the Proxy column in the profiles table, you can not only change the proxy on a specific profile, but also add a new proxy.
 On the Profiles tab, in the Proxy column, click on the + icon or on the name of the proxy currently bound to the profile (circled in green)
 In the modal window that appears, click the Add Proxy button
 In the form that appears, enter all necessary proxy data: protocol, IP, port, login, password, link to change IP. The list of available formats is available in the article About Proxy. After filling in all required fields click Save button
 The newly created proxy will be bound to this profile.
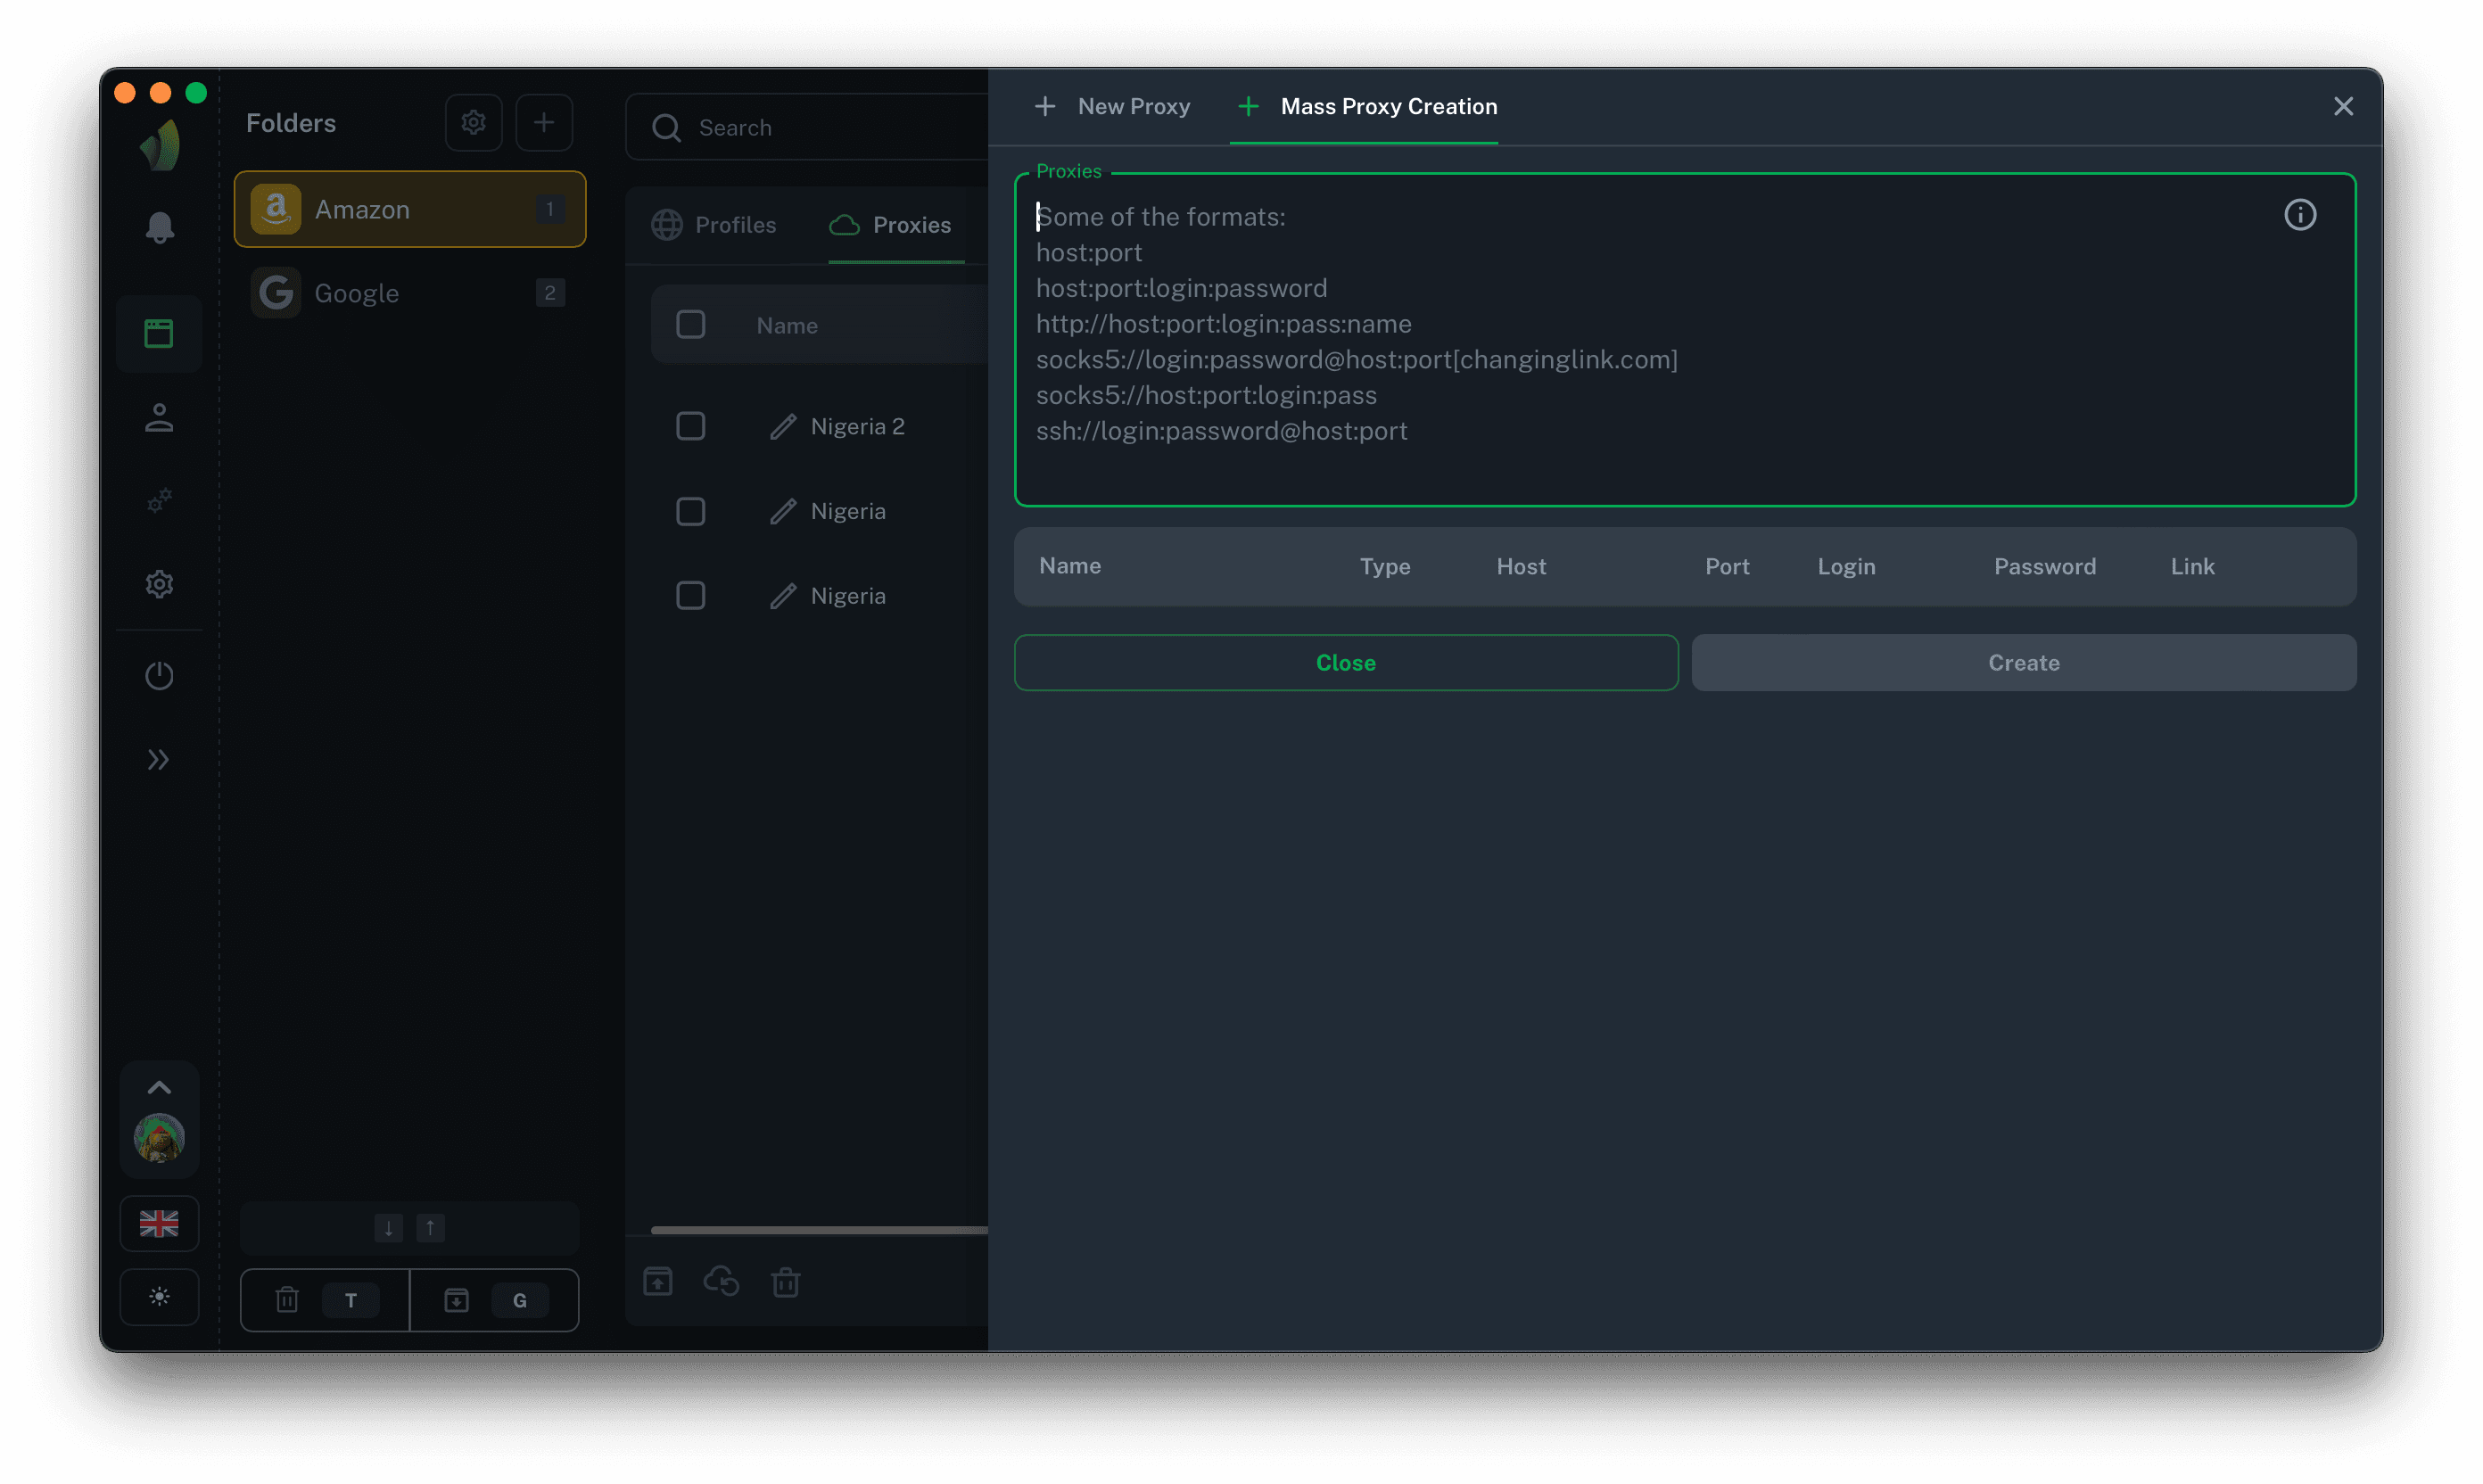
Mass proxy import
In Vision there is also a bulk method of adding proxies available, it is located in the proxy creation sidebar, under the Mass Proxy Creation tab
Click on the Create Proxy button (circled in green on the screenshot)
 In the sidebar that appears, click the Mass Proxy Creation tab
 In the form that appears, enter proxies in a list according to the available formats and then click Create.
 Once created, the proxies will appear in the general list of proxies in this folder.
Mass import of proxies using Drag'n'Drop
In addition to mass import from a form, you can also drag and drop a text file with proxies specified in the available formats and they will be recognized and added.